

Update and level X4pro & X4 plus.
it is advisable to replace the original Springs with silicone spacers but you do not have to do it. Use 18mm for plus and 16mm or 18mm for pro
It is not an affiliate link, and there are many other options available ( Amazon link https://a.co/d/00G7hOn )
Ok so now we have both pro and plus on 4 corner level.
There's one thing to be aware of with the Artilery X4 Plus, though. Unlike the X4 Pro, the latter has a manually adjustable platter with six screws and springs, three on each side of the platter, but it also has two aluminum spacers in the center. In my case, the spacers posed a problem that I'll discuss here.

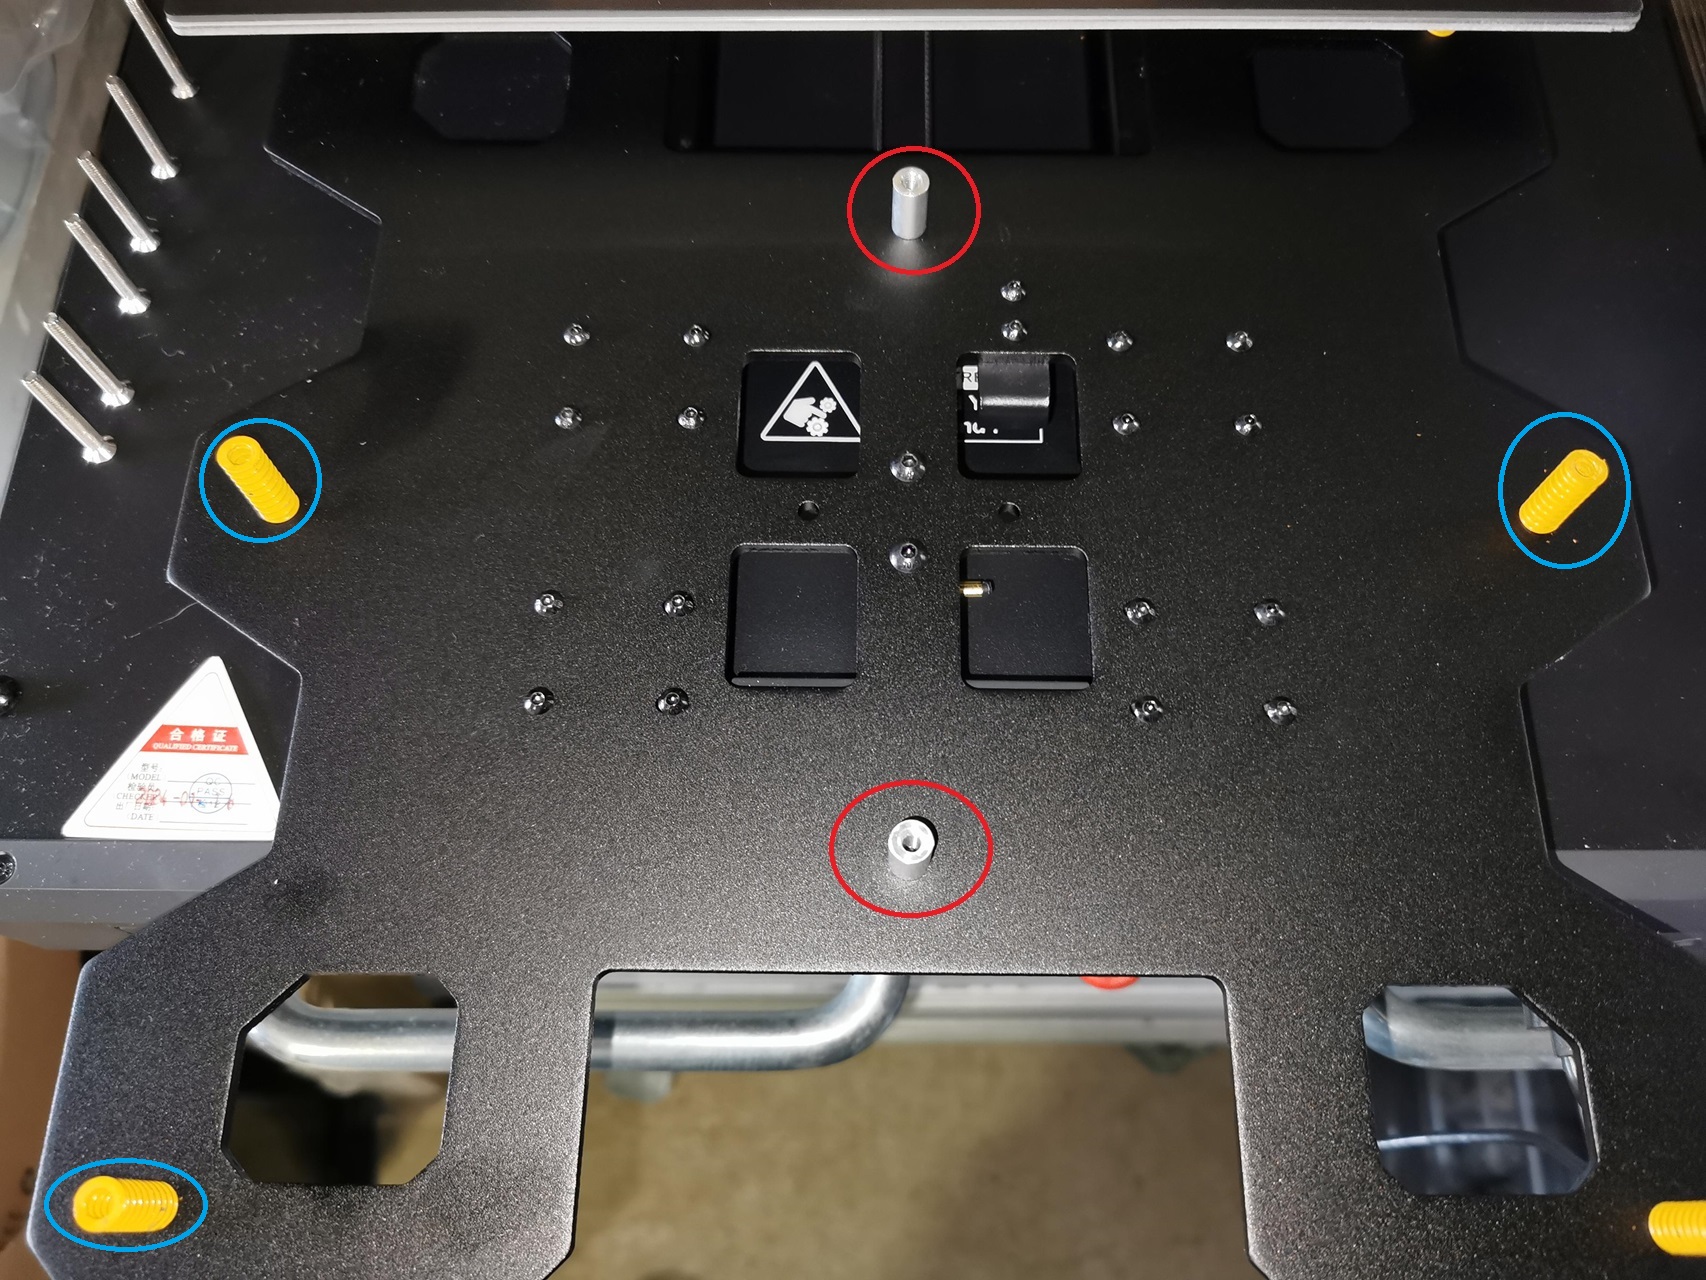
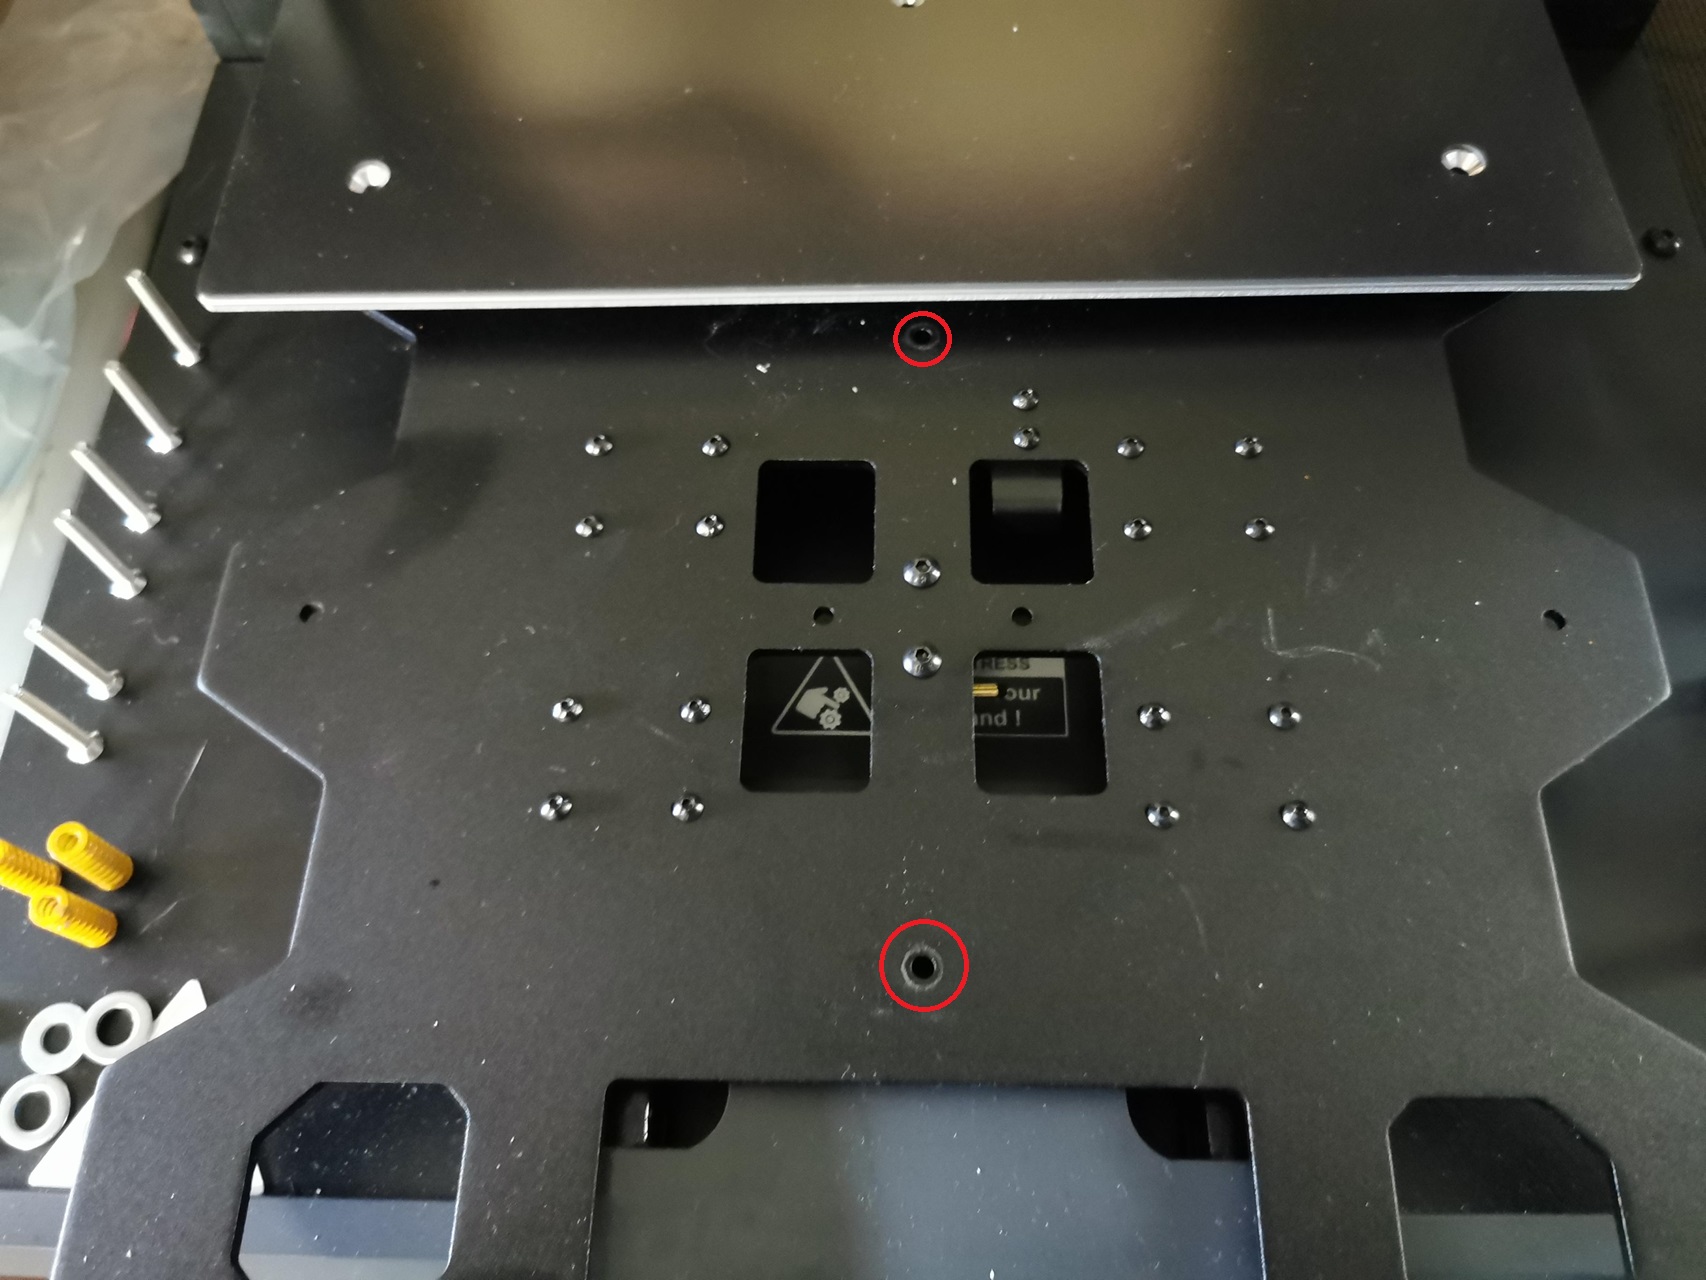
As I show in these photos, I decided to remove the aluminum spacers in the center of the chainring because with these, the chainring ends up strongly bulging in its center or we will have to loosen the manual adjustment screws of the chainring so much that the latter will no longer have any support.
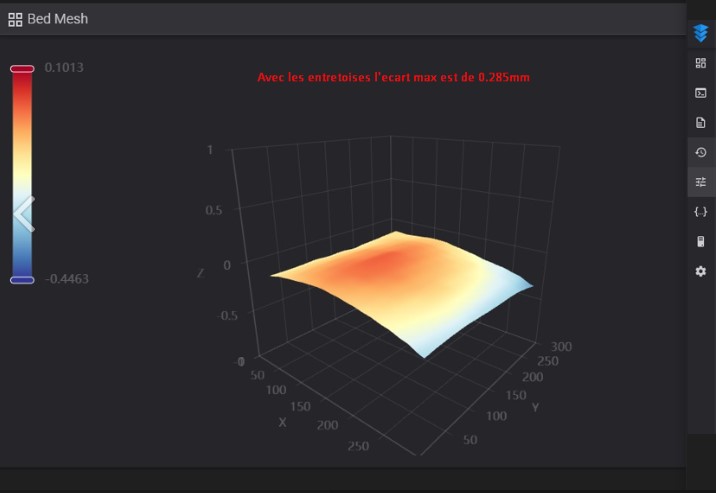
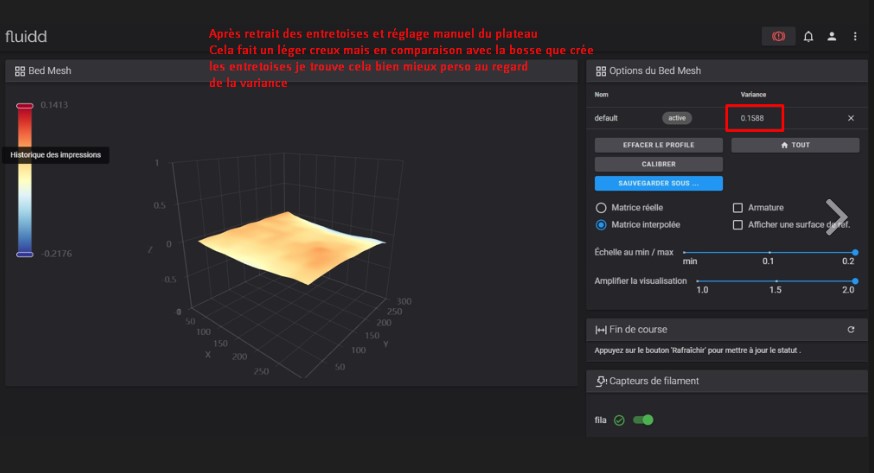
Before removing the two spacers, it was quite complicated to obtain a quality manual adjustment but once the spacers were removed, I managed to obtain a very satisfactory adjustment with a maximum difference between the highest and lowest value of 0.1588 compared to 0.285 previously.
(the above information courtesy of https://www.lesimprimantes3d.fr/)
You can then either manual level or use a software tool like Bed leveler 5000.
Using manual level first loosen the bed completely, heat bed to 65c.
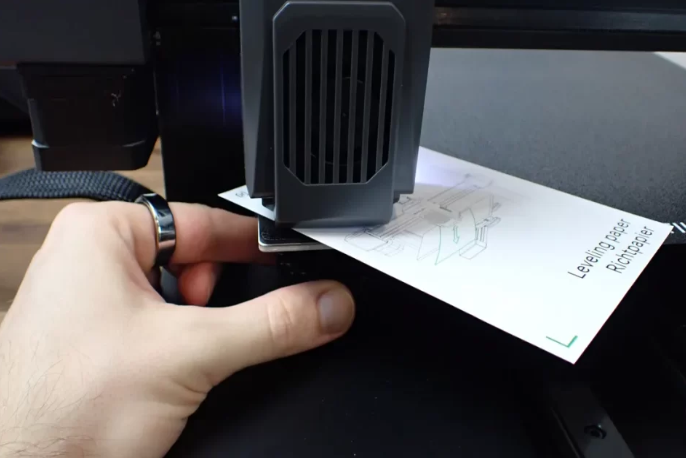
Set Z offset using paper 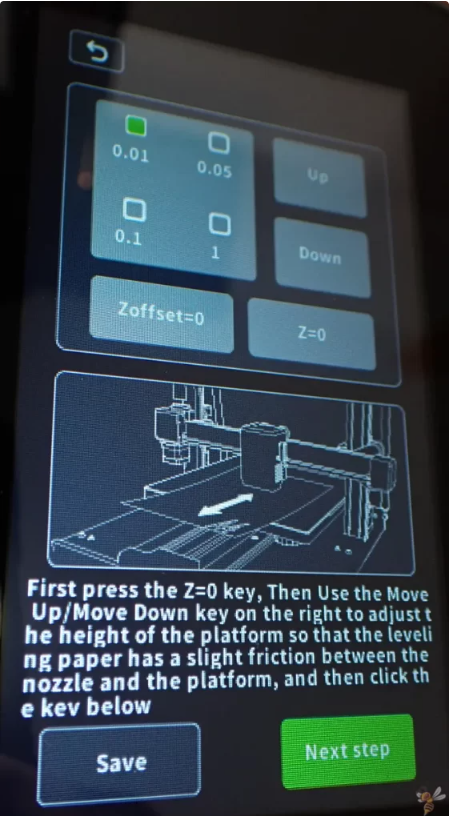
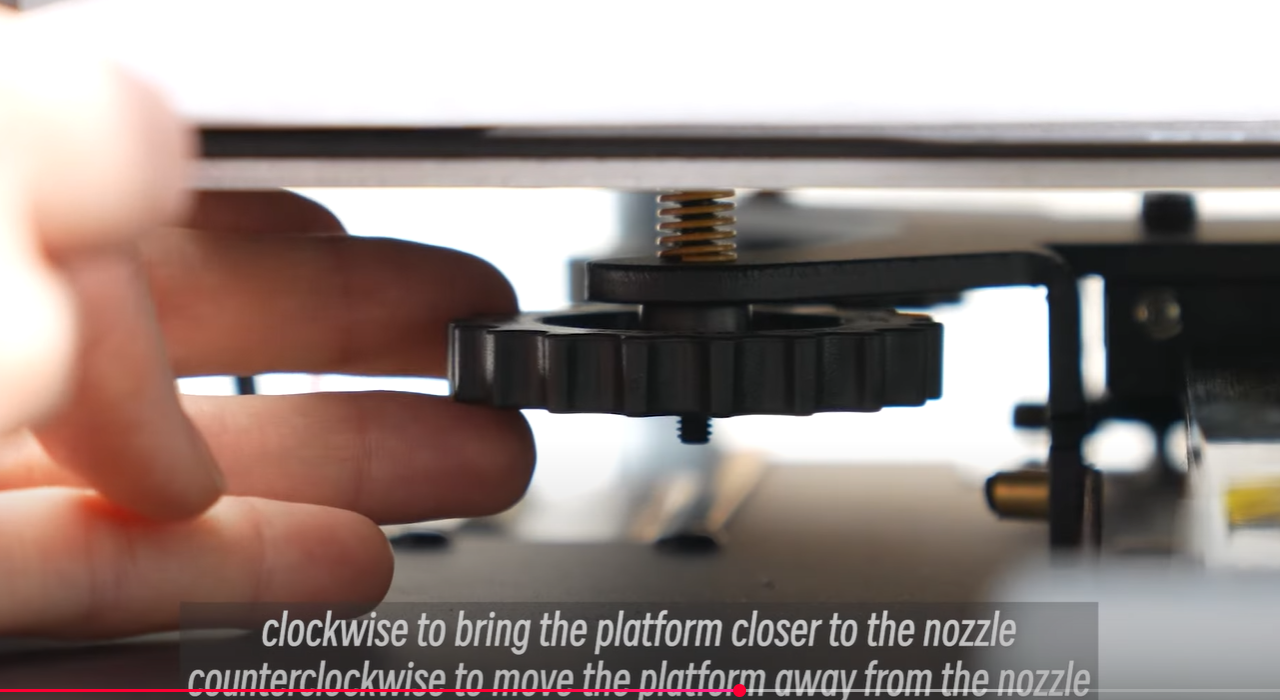
Then start winding the bed down slowly and evenly, 3 half turns front knobs then 3 half turn back knobs. until you have about 15 - 20 turns (you may need more)
Then redo the Z offset again. Run manual level, using paper on the 4 corners, remember wind slow and even. Run the auto level to see how the bed is on fluidd. if it is reasonable then start fine tuning the manual leveling again. Once happy remember to set Z offset before and after doing the Auto level.
Bed Leveler 5000 provides a simple method for paper and feeler gauge-free manual FDB bed leveling. No firmware, setting, configuration, or hardware changes are required to use Bed Leveler 5000 .
- Paper and feeler gauge-free bed leveling
- No printer modifications or extra hardware required
- 3D bed mesh visualizations
- Does not lose, corrupt, or change existing mesh(es) on the printer
- Utility for adding new printer support
- Utility for testing and exploring G-code commands
- For X4 use the X3 klipper setting in BD5000
It can also highlight if you have issues with H gantry ALIGNMENT. ie if the gantry is higher on the left or right of the bed thus causing issues.
Klipper bedlevel video. https://youtu.be/JBGN3U0C2LM?si=1HAD2tRXsUg8Kl9P
After leveling and Before printing do not forget to reset the z offset using paper.
Artillery X4 official levelling video; https://youtu.be/vt4VDZUE4oM?si=0TsPGdqw3dfr2MQ-
This video is for Artillery X2 but does give some good advise for general leveling using paper, so i have included it;
https://youtu.be/zKpNxqWie_8?si=NUvs-A_OlMQ_boLJ

 Happy3D-Thailand


อีเมล : happy3d_thailand@yahoo.com
TOP เลื่อนขึ้นบนสุด

